Combination instrument
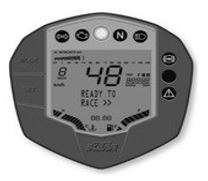
Activation and test
The combination instrument is activated when the ignition is switched on & emergency off switch is in ‘ON’ position
Test
Indicator lamps
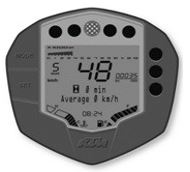
Display
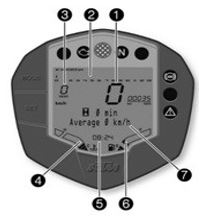
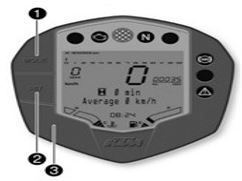
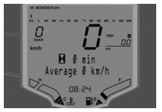
The speed 1 is shown in kilometers per hour km/h or in miles per hour mph.
The tachometer 2 shows the engine speed in revolutions per minute.The gear display 3 shows the engaged gear.
The coolant temperature appears in segment 4.
The time appears in segment 5.The filling level in the fuel tank is displaced in segment 5.
The info display 6 shows additional information..
Info After reconnecting the battery or changing the fuse, the time must be reset.
Filling level display in fuel tank
TRIP F Display :If the fuel level drops to the reserve mark, the display mode automatically changes to TRIP F1 and starts to count from 0.0, regardless of the previous display mode.
Info At the same time as the changes display mode TRIF F, the general warning lamp lights up and the warning note Low Fuel Level appears on the info display.
coolant temperature indicator
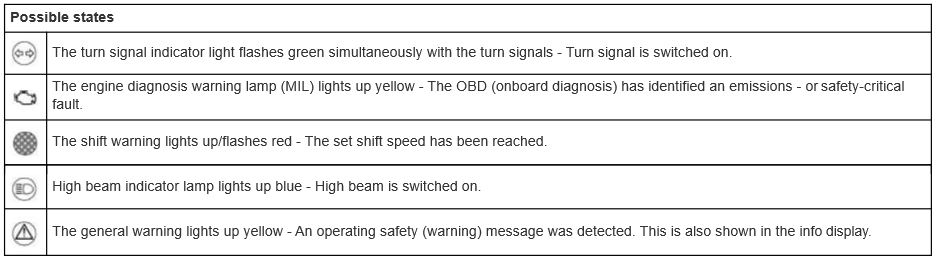
Possible states
Info display
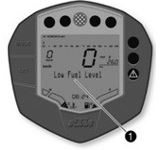
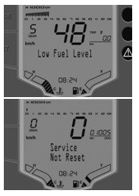
Low Oil Pressure appears on the info display if the oil pressure is too low.Low Fuel Level appears on the info display if the fuel level reaches the reserve mark.High Coolant Temperature appears on the info display if the coolant temperature rises above the specified value.
Side Stand Down appears on the info display if the side stand is folded down.Low Battery appears on the info display if the battery voltage falls below the specified value.
| Battery Voltage | 11.8 ± 0.2V |
Service not reset appears on the info display for 10 sec. When the ignition is switched ON & the distance interval between service appointments has been exceeded or the service interval display was not reset during a service appointment.
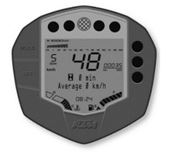
Riding time/average speed menu
Alternative 1
Press the SET button briefly and repeatedly until the desired info display appears. The riding time and average speed are displayed in this menu.
Info If the ignition was switched off for over 60 minutes, the display is reset to 0.
| Press the SET button briefly. | Next display mode on the info display. |
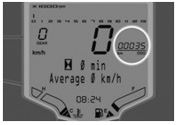
Average Fuel Consumption/service menu
Alternative 1
Alternate 2
Press the SET button briefly and repeatedly until the desired info display appears. The menu shows the average fuel consumption and the distance to the next service
| Press the SET button briefly. | Next display mode on the info display. |
Service/range menu
Alternative 1
Alternate 2
Press the SET button briefly and repeatedly until the desired info display appears. This menu shows distance to the next service and the riding time.
Total distance menu ODO
Alternative 1
Alternative 2
Press the MODE button briefly and repeatedly until ODO appears on the display. ODO shows the total distance covered
Info Info If the ignition was switched off for over 60 minutes,the display is reset to 0.
| Press the MODE button briefly. | Next display mode on the info display. |
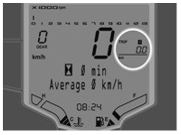
Distance menu 1 TRIP 1
Alternative 1
Alternative 2
Press the MODE button briefly and repeatedly until TRIP 1 appears on the display. TRIP 1 shows the distance covered since the last reset. For example; the distance from one refueling stop to the next. TRIP 1 is always running and counts up to 999.9
| Press the SET button for 5~10 seconds. | Display of TRIP 1 is reset. |
| Press the SET button briefly. | Next display mode on the info display. |
Distance menu 2 TRIP 2
Alternative 1
Alternative 2
Press the MODE button briefly and repeatedly until TRIP 1 appears on the display. TRIP 1 shows the distance covered since the last reset. For example; the distance from one refueling stop to the next. TRIP 1 is always running and counts up to 999.9
| Press the SET button for 5~10 seconds. | Display of TRIP 2 is reset. |
| Press the SET button briefly. | Next display mode on the info display. |
Setting kilometers or miles and Setting the time
Press the MODE button for 5 ~ 10 seconds.
The display changes from km/h to mph or from mph to km/h
Condition for setting time
Press the MODE and SET button for 5 ~ 10 seconds. The time display begins to flash.
Set the hours display using the MODE button.
Set the minutes display using the SET button.
Press the MODE and SET buttons for 5 ~ 10 seconds. The time is set.
Info Make the country specific setting.
Alternative 1
the MODE button briefly and repeatedly until TRIP 2 appears on the display.
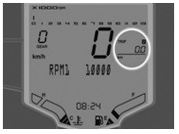
Press the MODE button for 5 ~ 10 seconds. The display RPM 1 appears.
Info The engine speed can be set at intervals of 50. RPM 1 is the engine speed above which the shift warning light starts to flash.
- Set the speed with the MODE and SET buttons.
Info The MODE button increases the value. The SET button decreases the value.
- Do not activate the two buttons for approx. 15 seconds. The display RPM 1 goes out and the set speed is stored.
Info Upon delivery, the speed of RPM 1 is set to 5000
Adjusting the shift speed RPM 2

Condition
Alternative 1
Press the SET button for 5 ~ 10 seconds. The display RPM 1 appears.
Info The engine speed can be set at intervals of 50. RPM 1 is the engine speed above which the shift warning light starts to flash. Speed RPM 2 must be higher than speed RPM 1.
Set the speed with the MODE and SET buttons.
- Do not activate the two buttons for approx. 15 seconds.The display RPM 2 goes out and the set speed is stored.
Info Upon delivery, the speed of RPM 2 is set to 5000. The RPM 1 and 2 can be altered only post 1000 Kms of vehicle running.
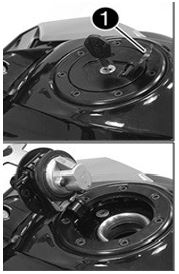
Opening the filler cap
Danger Fire hazard Fuel is highly flammable. Never refuel the vehicle near open flames or burning cigarettes, and always switch off the engine first. Be careful that no fuel is spilt, especially on hot vehicle components. Clean up spilt fuel immediately.
Warning Danger of poisoning Fuel is poisonous and a health hazard.Avoid contact between fuel and skin, eyes and clothing. Do not inhale fuel vapors. If fuel gets into your eyes, rinse immediately with water and contact a doctor. Wash affected skin areas immediately with soap and water. If fuel is swallowed, contact a doctor immediately. Change clothing that has come into contact with fuel. Store fuel in a suitable canister according to regulations and keep it out of the reach of children.
Warning
Environmental hazard Improper handling of fuel is a danger to the environment.
-Do not allow fuel to get into the ground water, the ground, or the sewage system.
Lift the cover 1 of the filler cap and insert the ignition key in the lock.
-Turn the ignition key 90° clockwise.
-Open the filler cap.
-Remove the ignition key.
- Note
Closing the filler cap

-Close the filler cap.
-Push down the filler cap until the lock engages
Warning Fire hazard Fuel is highly flammable, poisonous and harmful to your health. - When closing the filler cap, ensure that it is closed correctly. Change clothing that came into contact with fuel. Immediately clean skin which came into contact with fuel using soap and water.
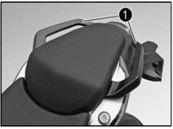
Seat lock
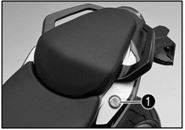
The seat lock 1 is located to the left of the seat. It can be unlocked with the ignition key.
Tool set and Grab handles
Passenger footrests and Shift lever
The passenger footrests can be folded in and out
Possible states
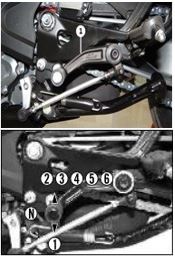
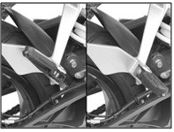
Shift lever 1 is mounted on the left side of the engine.
The gear positions can be seen in the photograph.The neutral or idle position is between the first and second gears.
Foot brake lever
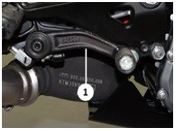
Foot brake lever 1 is located in front of the right footrest. The foot brake lever is used to activate the rear
Side Stand
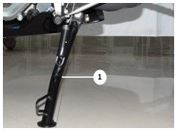
The side stand 1 is on the left side of the vehicle. The side stand is used to park the motorcycle.
Possible states
Info The call duration and contact are displayed. Depending on the cellphone settings, the contact is shown by name.